Google Meet is a very popular free-to-use video conferencing tool that replaces Google Hangouts. It's proved to be a super valuable way to hold group or one-to-one video chats with stable clear video and audio without paying a cent.
As such, it's ideal for schools where budget may be an issue but video interaction is needed to support the likes of Google Classroom. For example, educators can now create a unique Meet link and share it in the Classroom Stream or Classwork pages for students to easily access.
So here are the Google Meet tips and tricks you need to get the most out of the platform.

How to Use Google Meet Grid View
- Options (three vertical dots) > Change Layout > Tiled
One of the commonly asked about features is Google Meet grid view, aka tile view. In this mode, multiple screens are displayed at once, allowing you to see everyone in the video chat at the same time. While this isn't a feature made for the small screens of smartphones, it is an ideal option for larger laptop and desktop computer screens.
For teachers, this provides a good way to keep an eye on the entire class at once, and helpful for making sure everyone is present and paying attention.
This is also a nice way to keep an eye on certain students while remaining focused on the entire class. It offers a handy perspective of how students, and the class as a whole, are responding to your teaching.
This grid view is actually called "Tiled." To enter that mode you need to click on the options button that is the three vertical dots, then select "Change Layout" before picking "Tiled."
Mute Students in Google Meet
- PC/MAC: On the person's thumbnail select the three vertical dots > Mute
- Mobile: People > Mute
As the teacher leading a Google Meet call with a class, it is possible to control the students' privileges as your participants. One such option is to mute students. Options to pin and remove students are also available, but more on that below.
If you mute a student, they won't be able to unmute themselves. They also won't be heard by you or anyone else in the Google Meet video call. To do this on Mac or PC go to the person's thumbnail image and within that window select options, which is the three vertical dots in the corner, then select "Mute." On mobile, you need to tap the "People" tab then select the participant and select "Mute."
To pin a participant, which keeps their video always in focus, select the participant's thumbnail and the pin icon. This is a Mac- and PC-only option.
If you want to remove a student so they can no longer participate in the video or audio, this is an option, too. On Mac or PC select the back arrow icon, select the student, then select "Remove." On a mobile you'll need to tap the person's name and then the remove button (–).

Share Your Screen in Google Meet
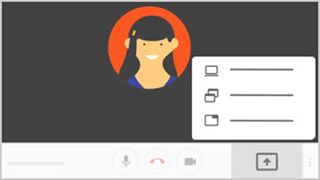
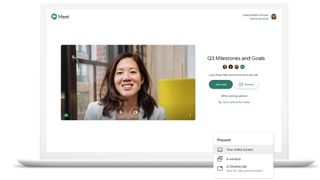
- PC/Mac: Present Now > Entire Screen > Share
- Mobile: Vertical dots icon > Present Screen > Screen Broadcast
If you want to give a presentation or perhaps show a resource to the whole class at once, screen sharing is a great option in Google Meet. A top tip here is to make sure beforehand you have any personal information or windows/tabs closed so when the screen does share, there is no chance of inadvertently showing more than you plan. Ideally, have the presentation or document open before following these next steps.
On Mac or PC, go to the bottom right of the screen and select the "Present Now" option. Then pick if you want to share "entire screen," "a window," or a "Chrome tab." To confirm, you must then click "Share." To end, you can select "Stop Presenting."
On mobile, you can share by selecting the options button (three vertical dots), then "Present Screen." Tap "Screen Broadcast" to confirm and begin. To end select "Stop Broadcast."
Another really useful option is to join only to screen share. This means your students will only see the presentation and not you. No audio or video will be sent, but you are able to see what the class is doing during the presentation. For this, select "Start a Meeting" from meet.google.com, the enter a meeting code, click "Present," select the window or app you're presenting, then "Share."
Keyboard Shortcuts for Google Meet
If you want to really command your Google Meet experience, it's all about keyboard shortcuts. These allow you to quickly select options without the need to look for and manipulate the mouse – ideal when focused on the class.
- Turn camera on and off: Cmd (Ctrl) + E
- Mute and unmute your microphone: Cmd (Ctrl) + D
- Announce who is currently speaking: Shift + Cmd (Ctrl) + Alt + A, then S
- Announce current information about the room: Shift + Cmd (Ctrl) + Alt + A, then /

