
This article was updated in September 2023
Screencastify is an easy screen recording tool that can be a helpful addition to a teacher's or student's digital arsenal.
This is most likely going to be used more by teachers as a way to record what is happening on screen, perhaps while adding a voiceover to guide students. As this is a simple extension it is very easy to install and use on multiple devices.
You will need a webcam to record your face, in a box-out, as well as the screen recording, but this is easily set up. Teachers can use this to create assignment guidance or teaching around digital documents, images, videos, and more -- for use in the classroom and beyond.
This is super simple to use and even offers editing, making it a viable option for students submitting assignments too.
If this is for you, also check out our Screencastify lesson plan for middle and high school to learn more.
What is Screencastify?
We have already answered what Screencastify is on a basic level. However, to provide more clarity, it is an extension that works using Google and, specifically, Chrome. That means it can, technically, record a video of anything going on within a Chrome browser window.
Except it does more. You can also use Screencastify to record your desktop, so recording something such as a Microsoft PowerPoint presentation is an option.
Yup, there's more. This platform will also allow you to record from a webcam. Thus, whatever you're doing on camera can be captured, showing your face in a small cut-out window as you talk through what's happening on screen.

What's new in Screencastify?
Screencastify added a helpful toolbar to the menu that keeps everything accessible but adds some more power to the process.
Beyond recording and editing you can now add extras such as using a pen to edit and an eraser to change, plus stickers and shape tools to add even more personality to projects.
You can now draw the attention of students to specifics by using fireworks animations, radiant effects, and more.
How to get started with Screencastify
To get started with Screencastify you'll need to download the extension from the Chrome Web Store while using the Chrome browser, and have it installed by selecting "Add to Chrome."
Once installed, you'll see the Screencastify icon in the top right of your Chrome browser next to the address bar. This is a right-pointing pink arrow with a white video camera icon within it.
Select this to get started or use the keyboard shortcut on PC Alt + Shift + S, and on a Mac, Option + Shift + S. More on useful keyboard shortcuts below.
How to use Screencastify
Once you've selected the Screencastify icon in the Chrome browser it will launch the app in a pop-up. This allows you to pick how you want to record from three options: Browser tab, Desktop, or Webcam.
Tabs are available to turn on a microphone and to embed a webcam if you want your image in the corner of the video over the top of the screen in use. Then hit record and you're up and running.
How to save videos with Screencastify
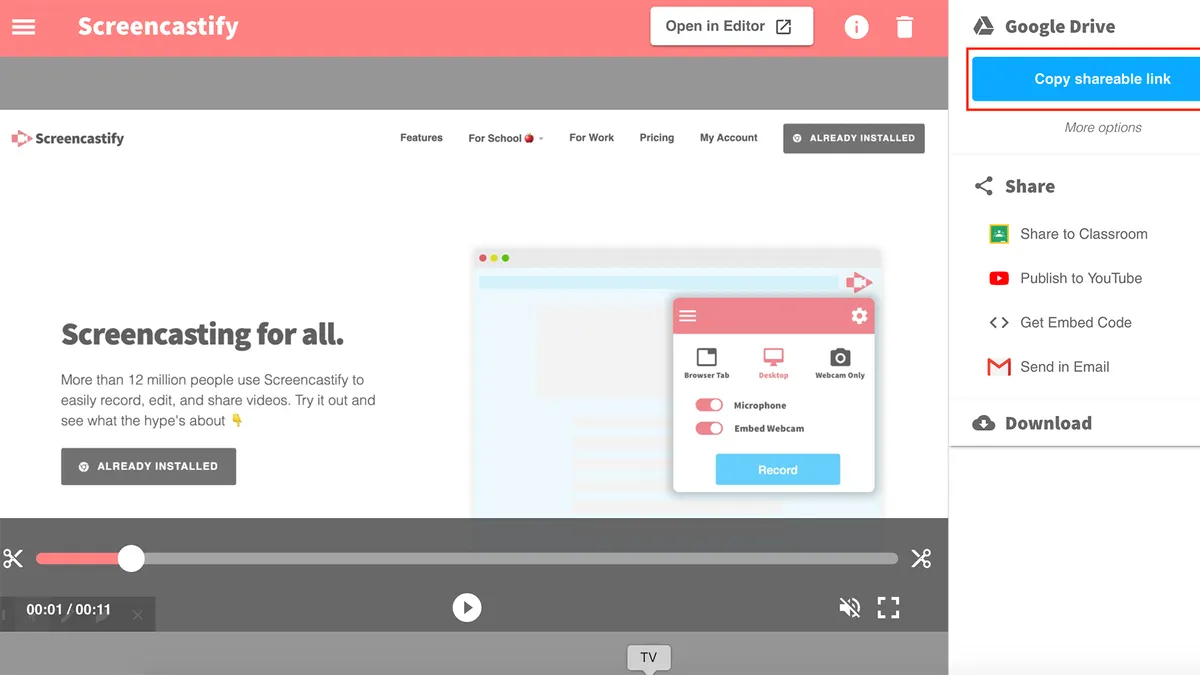
One of the great features of Screencastify offers is its easy way of recording and storing videos. When you end a recording you'll be taken to the Video Page, through which you're then able to edit, save, and share the recording.
You can also share to YouTube. On the Video Page in the Share options, simply select "Publish to YouTube" and you can connect to your account. Select the YouTube channel on which you want the video to appear, add privacy choices and a description, hit "Upload," and you're done.
You can also save to Google Drive, but more on that below.

Link your Google Drive to Screencastify
One really nice option is the ability to link this to your Google Drive. By doing so, your recordings can be automatically saved to your Drive without having to do anything extra.
To do this, open the Screencastify Setup page, select the "Sign in with Google" icon, then select "Allow" to give camera, microphone, and drawing tools permissions, and then select "Allow" from the pop-up. Then each time you finish a recording, your video will be saved to a newly created folder in your Google Drive called "Screencastify."
Use drawings and annotations in videos with Screencastify
Screencastify allows you to draw on the screen to better clarify what you're talking about, such as within a browser tab. For example, you might have a map displayed and want to show a section or a route, which you can do using a virtual pen.
An option allows you to highlight your cursor, adding a bright circle around the icon. This can help students better see what you're drawing attention to as you move the cursor around the screen. It's a bit like a laser pointer on a real-world blackboard.

What are the best Screencastify keyboard shortcuts?
Here are all the Screencastify keyboard shortcuts you could want for both PC and Mac devices:
- Open the extension: (PC) Alt + Shift + S (Mac) Option + Shift +S
- Start / stop recording: (PC) Alt + Shift + R (Mac) Option + Shift + R
- Pause / resume recording: (PC) Alt + Shift + P (Mac) Option Shift + P
- Show / hide annotation toolbar: (PC) Alt + T (Mac) Option + T
- Focus spotlight on mouse: (PC) Alt + F (Mac) Option + F
- Highlight mouse clicks with red circle: (PC) Alt + K (Mac) Option + K
- Pen tool: (PC) Alt + P (Mac) Option + P
- Eraser: (PC) Alt + E (Mac) Option + E
- Wipe screen clear: (PC) Alt + Z (Mac) Option + Z
- Return to mouse cursor: (PC) Alt + M (Mac) Option + M
- Hide mouse when not moving: (PC) Alt + H (Mac) Option + H
- Toggle embedded webcam on/off in tabs: (PC) Alt + W (Mac) Option + W
- Show / hide recording timer: (PC) Alt + C (Mac) Option + C
How much does Screencastify cost?
The free version of Screencastify provides many of the recording options you might need but there is a catch: Videos are limited in length, and editing is limited. That could be all you need, and in fact, is a good way to keep videos concise so students can stay focused. But if you're planning to do more, such as an entire lesson, you will need to pay.
In the Premium version, your unlimited recordings don't have that logo on the screen. More complex video-editing tools such as cropping, trimming, splitting and merging, to name just a few, are also available.
Pricing starts at $49 per year, per user. Or there are educator-specific plans that start from $29 per year.
For true unlimited access, however, it's $99 per year - or $49 with that educator discount - which includes as many teachers using the software as needed.
Screencastify best tips and tricks
Teach navigation
Use videos to help teach students how to navigate online resources such as databases so they can get access to more information in their own time.
Embed questions
Place questions in your videos to make sure students are listening, learning, and are able to grasp what you're presenting.
Use with Google
This system is made to work with Google Classroom or Google Drive, so you can easily share creations with students or groups, directly.
