A Tech-Friendly Peer Feedback Strategy
In today’s blog post, I want to share with you a combination of two favorite EdTech tools.
This past summer, I had the opportunity to work with high school students attending a design camp. In today’s blog post, I want to share with you a combination of two favorite EdTech tools. You’ll hear about a peer feedback strategy I used with students this summer, and tips for how to tailor this activity to your own group of students.
Regular readers of the blog know I am a huge fan of the Adobe Spark tools. You might have downloaded my free graphic organizers or checked out the book Ben Forta and I wrote all about Adobe Spark. One of the great things about this open-ended creation tool is that it can facilitate conversations on the iterative process and how to provide feedback to peers.
A student can create an Adobe Spark Video, Page, or Post. Then they can share it in an online space and ask for feedback from their classmates. Let’s take a look at this peer feedback strategy!
Sharing Student Work
Now you might already use a tool like Google Classroom or Schoology to have students share and provide feedback to one another. Another option that I love to use is Padlet. With both a free and paid version, there are different options to help you get started right away. One of the reasons I love Padlet is because it doesn’t require that students are part of an LMS or have access to a CMS. They also don’t need another login or account to use this tool.
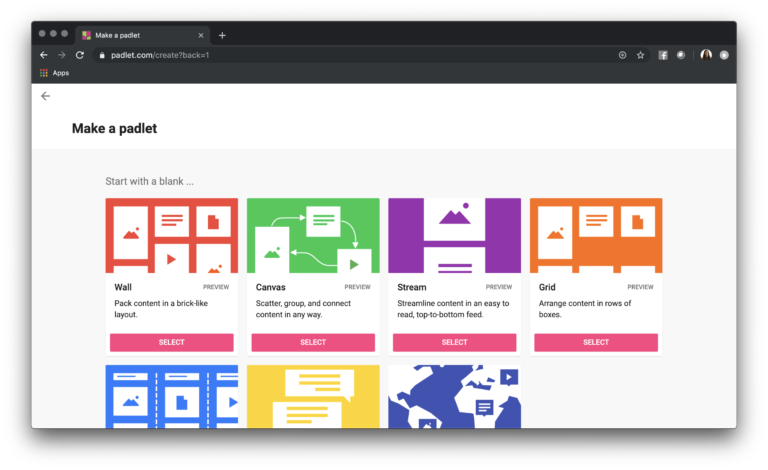
Padlet makes it easy for someone to set up a space for students and allow them to post their work. How does it work? All you have to do is set up an account on Padlet’s website. Then you choose the type of Padlet you want to share with students. I typically use the Wall layout. This layout gives students space to share their thinking, and it organizes every post as students add it to the page.
When students are ready to share their work, they can post a link, a file, or a text update to let everyone know what they’re working on. Then their classmates can check out where they are in the creation process before having conversations that provide feedback. Let’s look at this workflow with Adobe Spark creations in mind.
Adobe Spark and Padlet Workflow
Imagine your students are creating a movie in Adobe Spark Video. Spark Video is one of my favorite open-ended creation tools, and the graphic organizers linked here are ones I’ve used with students and shared with teachers all over the world. If the students in your class are putting together a video, they may be ready for peer feedback.
Tools and ideas to transform education. Sign up below.
Peer Feedback Workflow
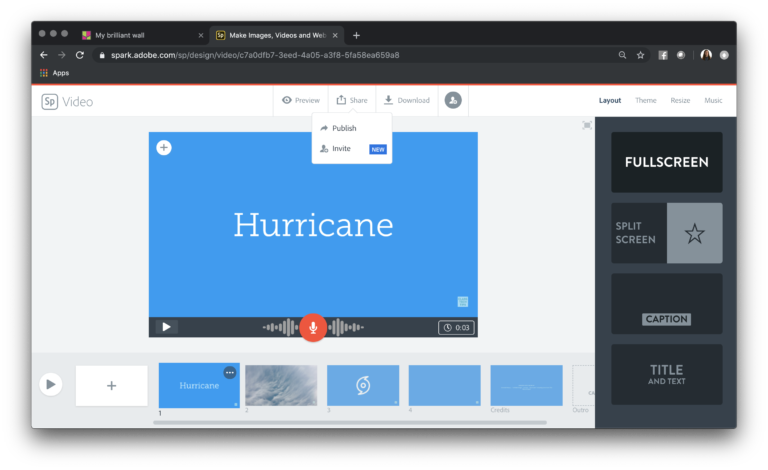
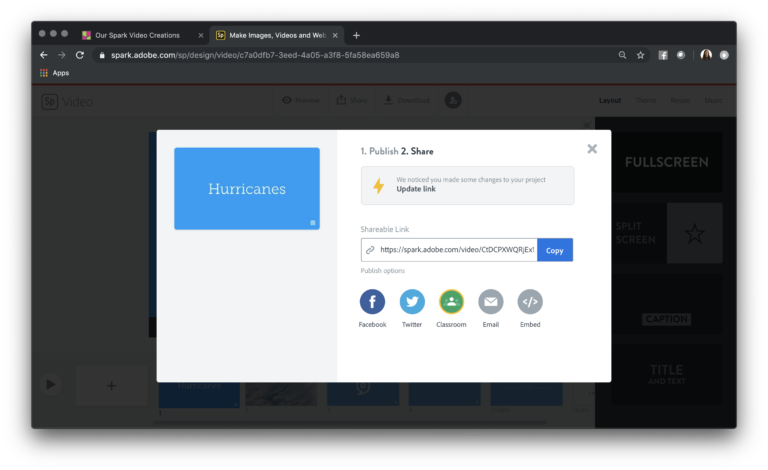
Here’s a workflow you can try. With ten minutes or so left of class time, ask students to share their Spark Video creation and publish it with a link. Remember you’ll want to have permissions in place for students to post their work online. The button at the top of the screen lets students access a link to their book.
Then students can take the link and post it on a class Padlet page. They might include a note with a question or wondering they have. This workflow can help students get feedback from a classmate. To share their link in a Padlet creation, students tap on the pink button at the bottom right-hand corner of their screen.
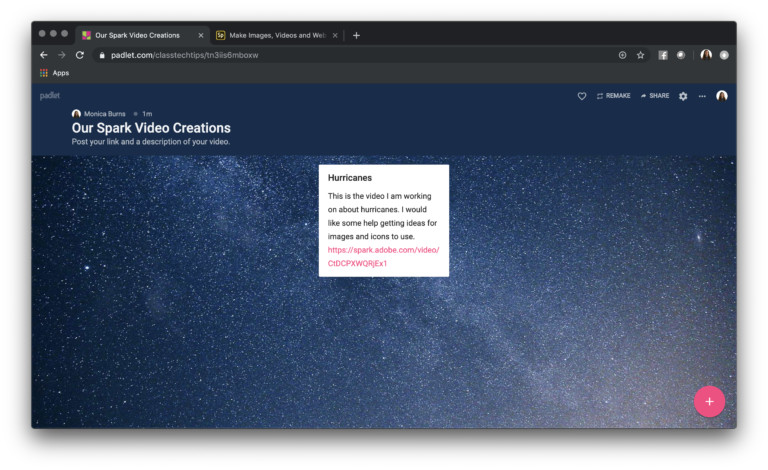
Peer Feedback Strategy
After students have posted their Padlet link, they can partner up and click on the link for each other’s video. Students can watch together and talk about their Spark Video while giving feedback to their classmates.
If students create videos over the course of a few days, you can revisit this Padlet space with them. They can update the Spark Video link at the end of each class, and the link on the Padlet page will update automatically to their new updated video. This strategy is an excellent way for students to check in with one another and see the progress of their creations.
Tips for Sharing a Padlet
Here’s a Padlet tip, you might share the link to your Padlet in a space your students already used, so they can easily click on it. Alternatively, you might turn it into a QR code for them to scan on their device. One option I use all the time is a URL shortener called Bitly.
With my free Bitly account, I can paste in the long Padlet link. Then I can change it to something that resonates with the group — such as the date, the class number, or the room we are in that day. Then students can type in the Bitly, access everyone’s creations, and add their own too.
If you’re a member of the Easy EdTech Club (get on the waitlist here) you’ve already heard some of the reasons why I love Padlet and social media-inspired projects.
Just like the summertime workshop I led for high school students, you can use this combination of two favorite EdTech tools too. Try out this strategy to help students share their work this school year, and give feedback to their classmates!
cross posted at classtechtips.com
Dr. Monica Burns is a former classroom teacher, Speaker, and Curriculum & EdTech Consultant. She is the author of Tasks Before Apps (ASCD) and #FormativeTech (Corwin). Visit Monica's site ClassTechTips.com for more ideas on how to become a tech-savvy teacher.
