Utilizing Appointment Slots in Google Calendar

Cross posted at ThumannResources.com
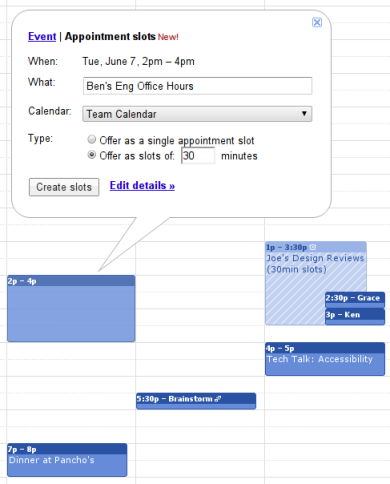
During the first of four days of Google sessions atGoogle Daysin Minot, ND this week, the Gmail team announced a new feature inGoogle Calendar. This new feature would allow people to view available time slots that you have set up on your calendar. They are able to select that time slot and it will be both reserved on their calendar for you and will conveniently appear on your own Google Calendar as well.
For step-by-step directions, visit http://gmailblog.blogspot.com/2011/06/introducing-appointment-slots-in-google.html.
It was finally on Thursday, during the 3-hour working session at the end of the day that I finally got a chance to sit down with some of the attendees and work with this new feature. Using Appointment Slots was relatively easy. The directions at http://www.google.com/support/calendar/bin/answer.py?answer=190998 took us through the steps to develop the schedules for each of the labs.

We used Appointment Slots at#gdminotto set up Calendars for teachers to sign up for the different computer labs in the building. So, we actually needed to make a unique calendar for each of the labs, yet we wanted to have all the calendars showing together when we embedded it on the Google Site. The issue that we ran into was that Google Sites wouldn’t allow us to embed multiple calendars.
How to embed multiple Google Calendars:
- Click to the right of your calendar, click the drop down menu and click calendar settings
- Click the link for Customize the color, size and other options
- scroll down to the bottom of the page and on the left select all the calendars you want to include
- Scroll back up and click the update HTML button
- Cope the code to your clipboard
- Open your Google Site and go to the page you want to embed the calendar on.
- Click edit
- Click the Insert menu and scroll down to More Gadgets
- Click on the Featured gadgets and select the “Embed Gadget”
- Click the “select” button
- Paste the HTML code in the blank box
- Change your width to 800
- Change the height to 600
- Click the checkbox that will include the scrollbar
- Click OK
- Save your page to view changes.
I know this seems like a few too many steps, but it was worth it to see all the calendars in one place. Give it a try!
Tools and ideas to transform education. Sign up below.
