What is Google Forms and How Can It Be Used by Teachers?
Learn everything you need to know, as a teacher, about using Google Forms in class

Google Forms is a fantastic tool for teachers to help enhance the way class works. Since it's a free, online-based platform that plays nicely with Google Classroom, it's well worth a try for anyone new to this excellent organizational tool.
- What is Google Classroom?
- What is Flipgrid and How Does It Work for Teachers and Students?
- What is Google Sheets How Does It Work for Teachers?
Google Forms, as the name might give away, is a quick and easy way to leverage the form-based system to create quizzes, make grading faster and easier, and more.
Since it is all cloud-based, distributing anything you create is as simple as sharing a link. You can collaborate with other teachers and share quizzes for editing to suit the subject, for example.
So how can you start using Google Forms now and what are some of the best ways to get the most out of it for class?
How to Get Started with Google Forms
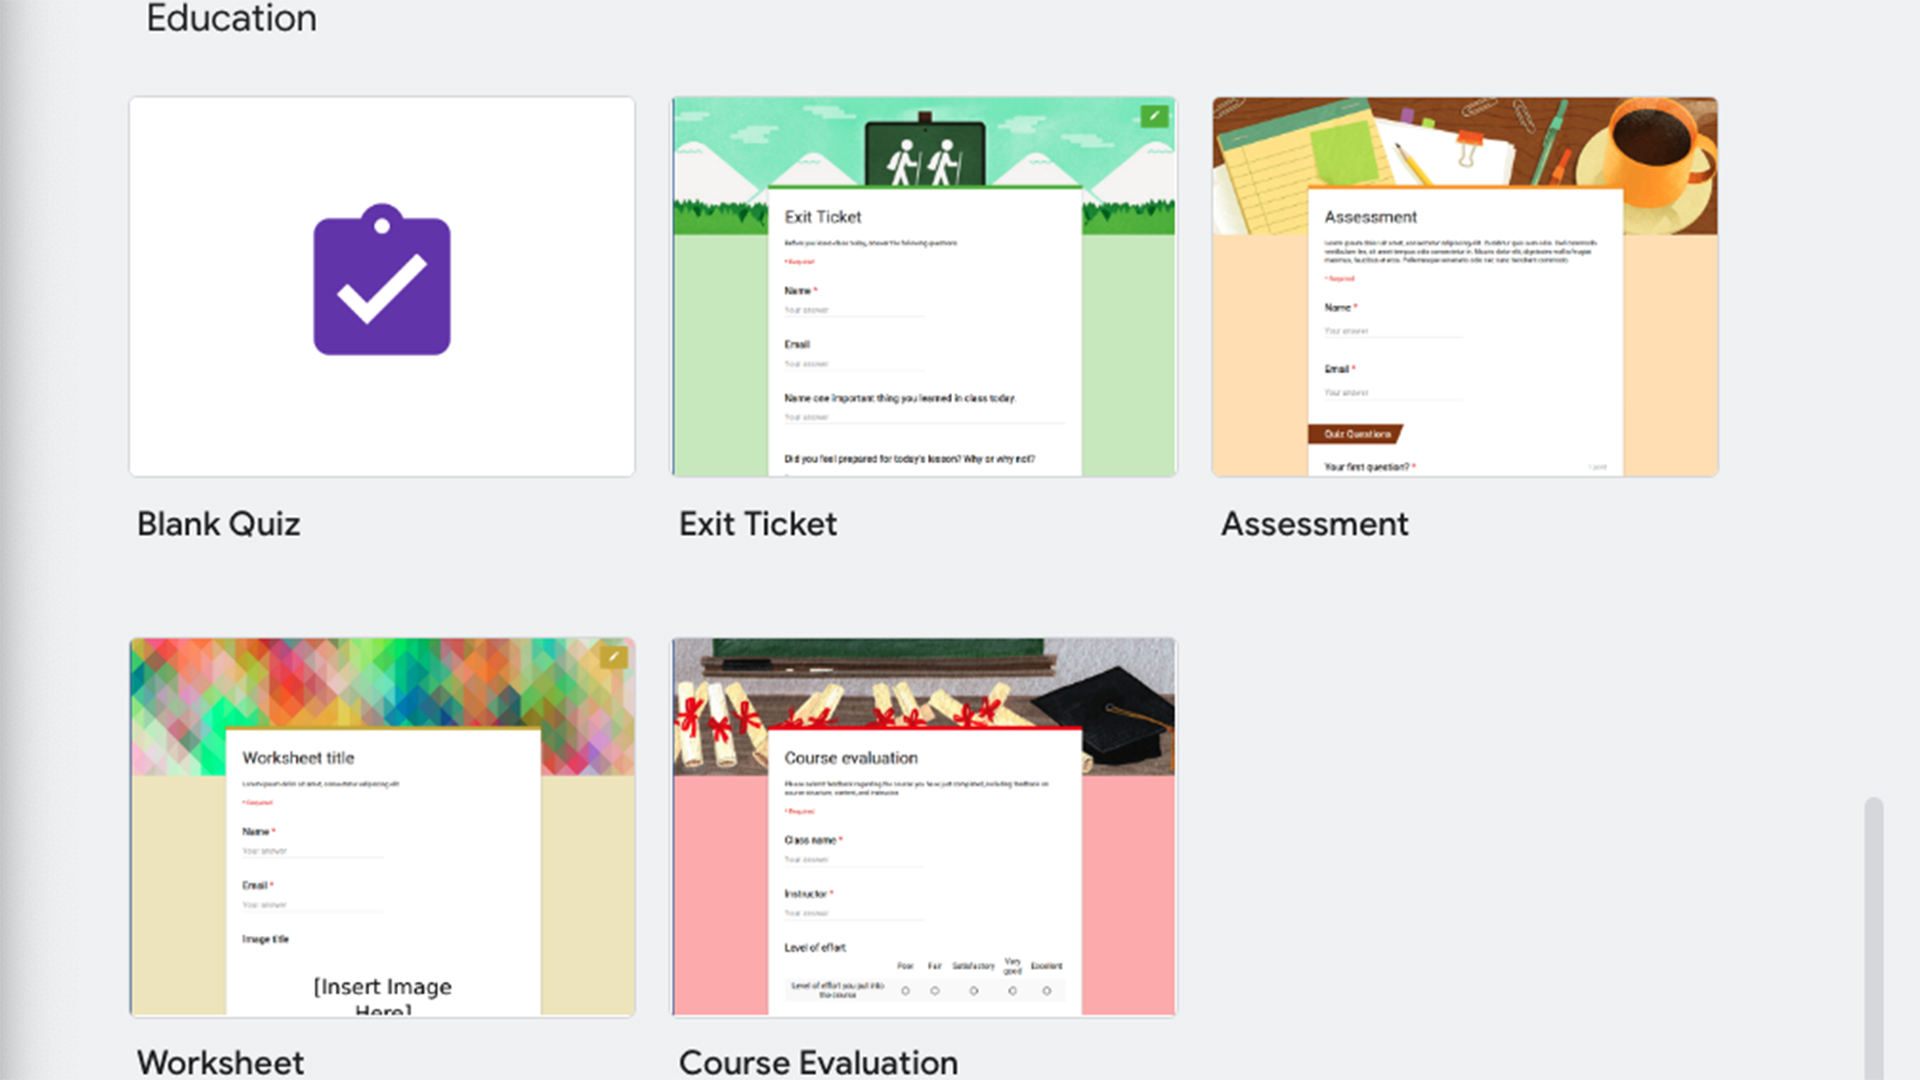
If you don't have a Google account, signing up for one – for free – is your first step. Then head on over to Google Forms by going into your G Drive. To create a new Form from scratch, select the "New" icon, then "More" before picking "Forms." If you want more of an overview of options, such as templates, go directly to your Forms link here.
In addition to "Blank," there is a selection of prepopulated options. Scroll down to Education for the most relevant. This includes options such as a quiz, assessment, worksheet, and more.
If you're signed into Google Classroom with your school this may look a little different. Options are broken down into "Your school department" and "General." The former are pulled in from your linked account if you have Google Classroom setup with your Google account. The rest are the generic offerings from Google.
Tools and ideas to transform education. Sign up below.
Create a Quiz using Google Forms
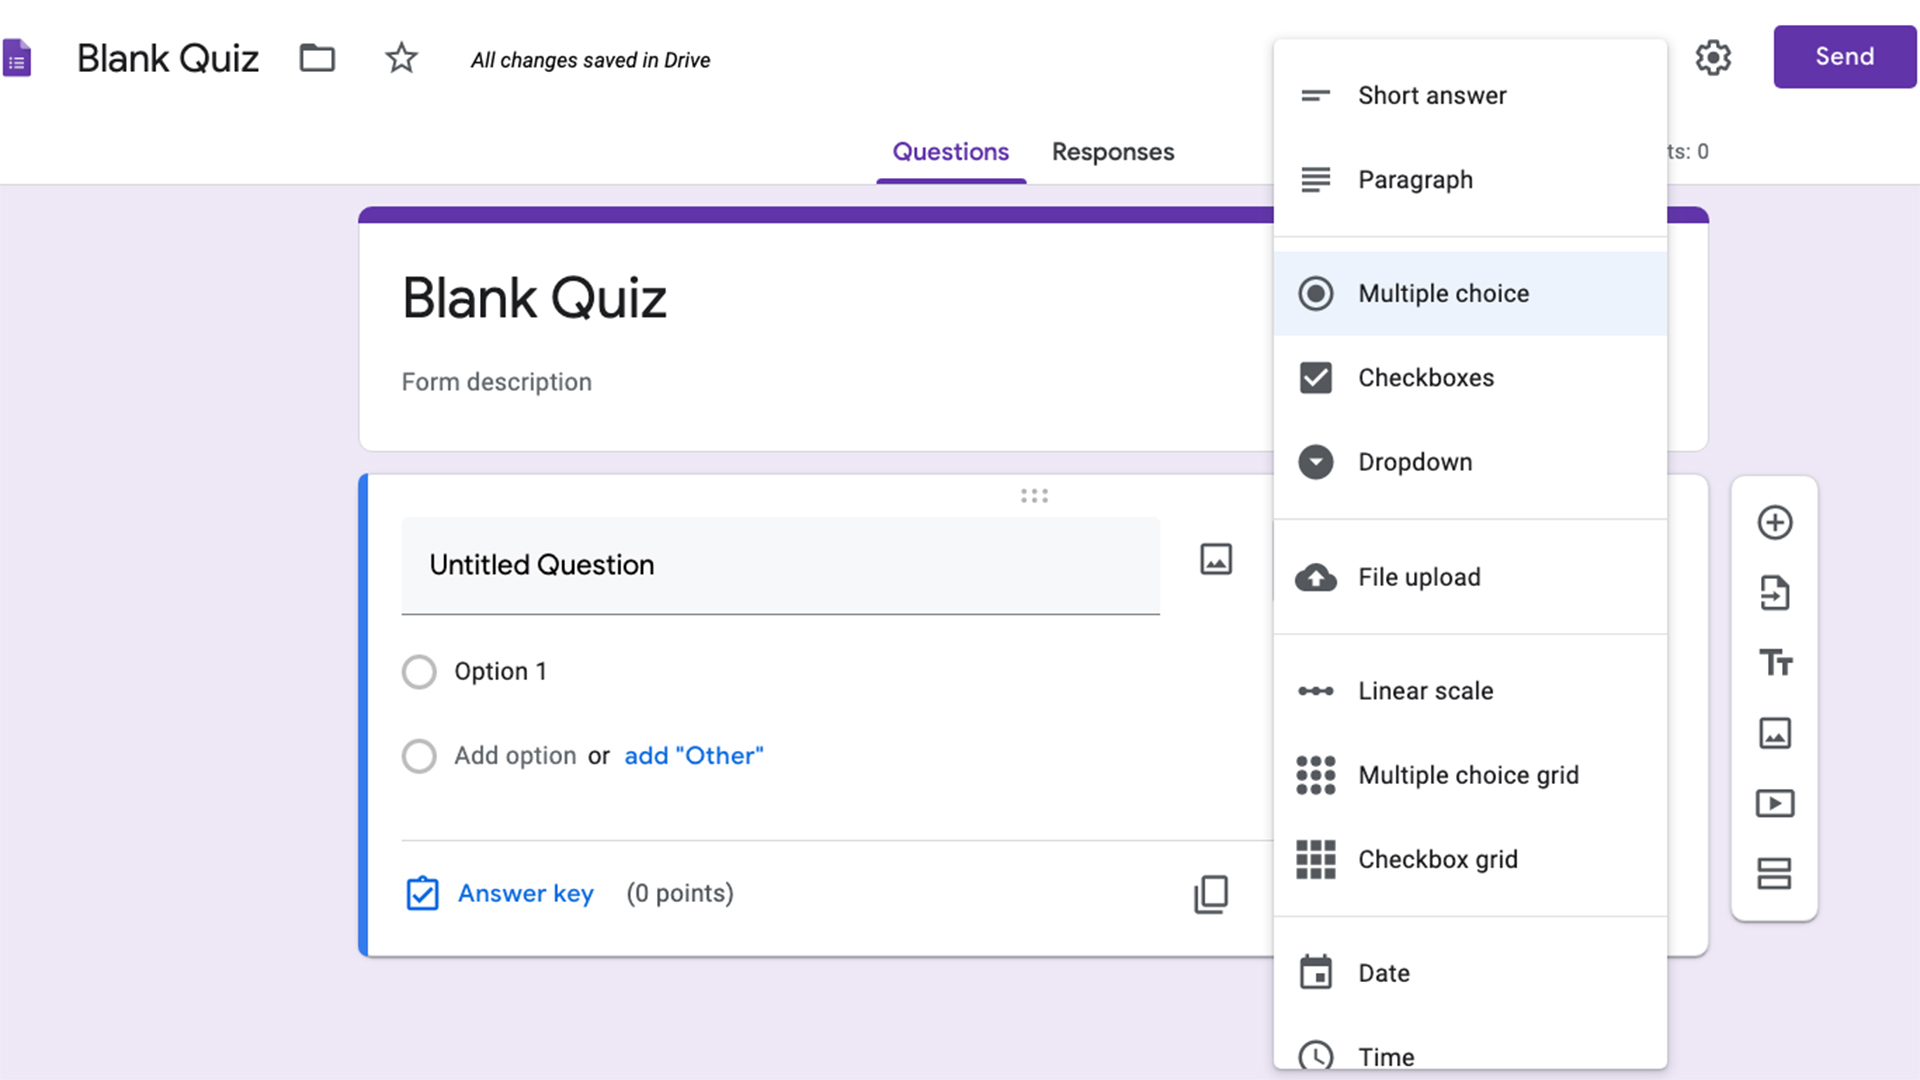
One of the most straightforward ways to use Forms is as a quiz platform. It's built well for this, making one very easy to create. Simply go to Create a new Form and select "Blank Quiz" from the templates.
Here you can give the quiz a title and a short description. Then, using the drop-down menu to the right, you can select the answer style – multiple choice, for example. Short answer and Paragraph are good options if you're setting more of an essay-style quiz.
Either way, the next step is to add a question. Then, below that box, give an answer option and add more, as needed, writing in an answer option for each. You then have the option to give points for each answer by selecting the "Answer key" below.
You're also then able to "Add answer feedback" both for correct and incorrect answers. You can even insert a link or video to go with that feedback.
To add the next question, select the plus icon from the bottom, which will read "Add question" if you hover over it. You can also add images and videos, or import questions as needed.
If you don't want the student to progress to the next question until the current question is answered correctly, select the "Required" toggle.
How to Setup a Locked Quiz
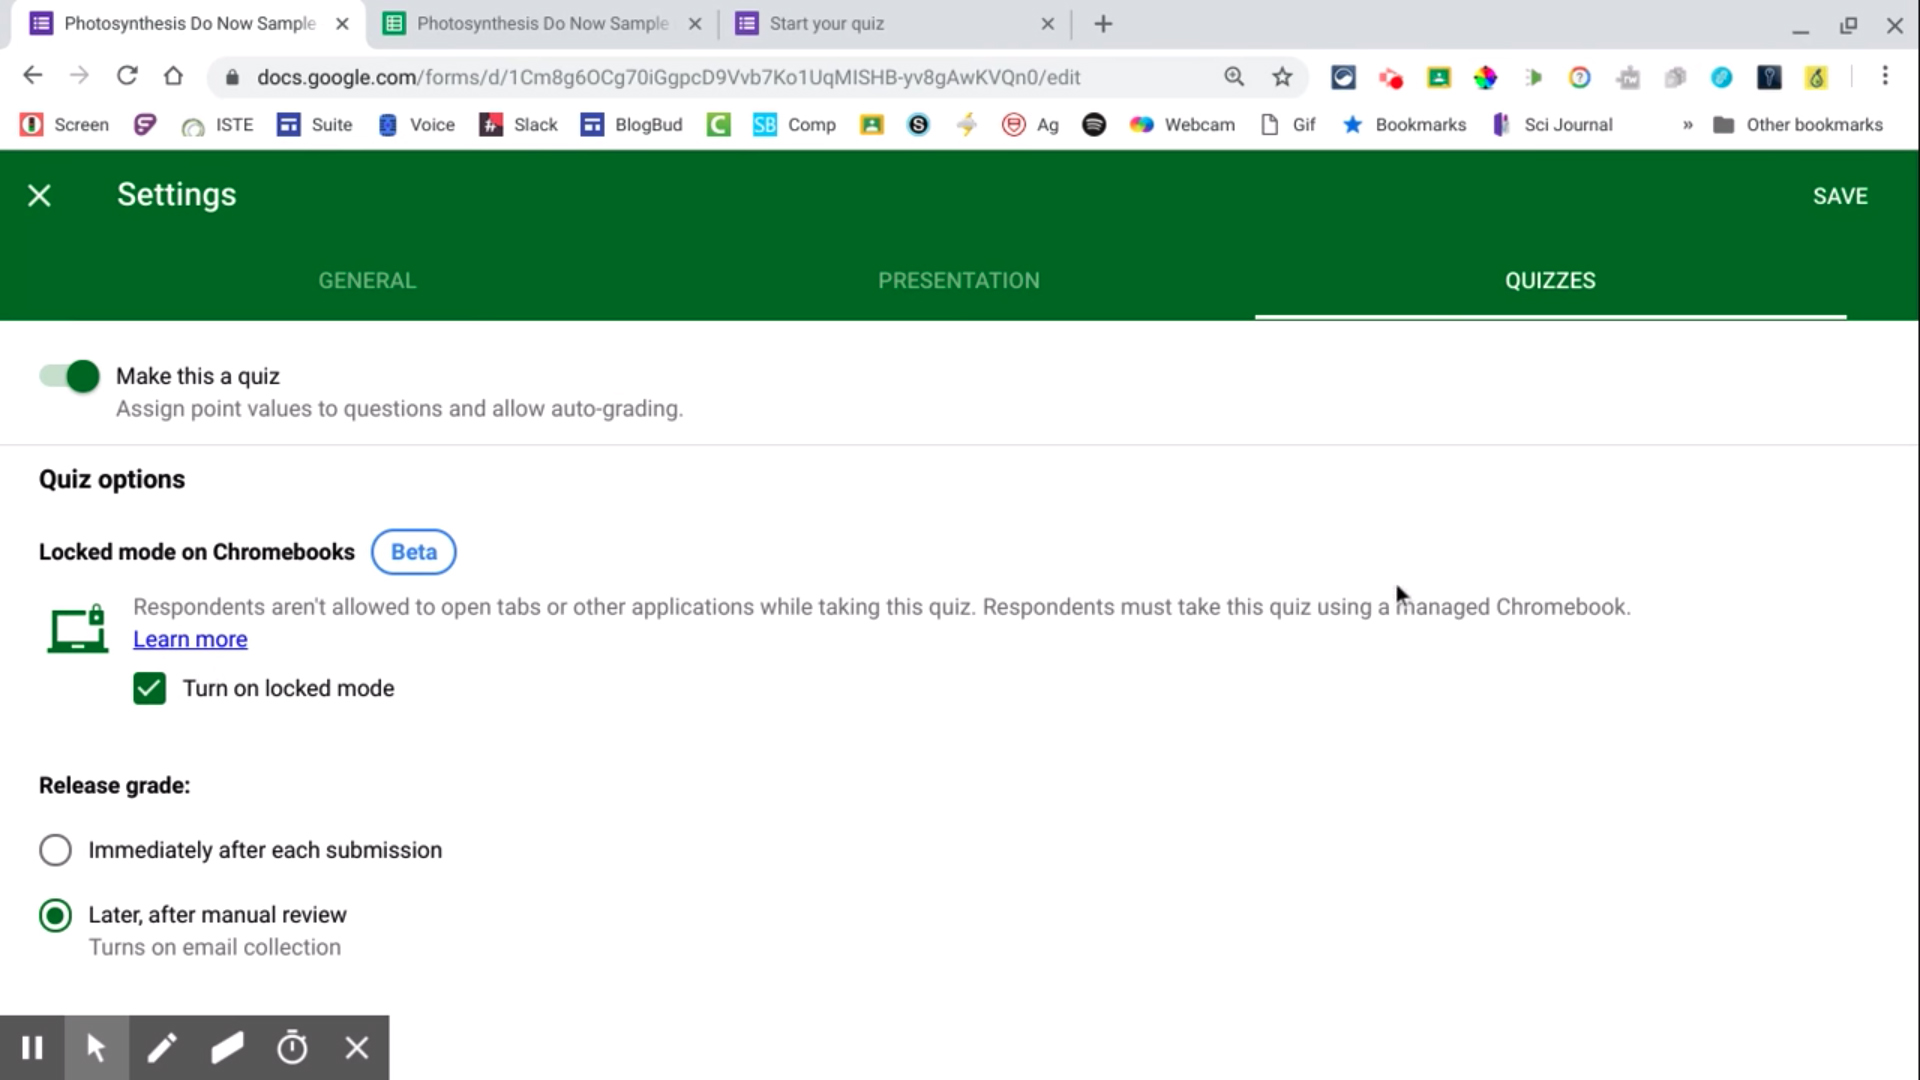
A useful feature that works on Chromebooks on a school network only is locked quizzes. This can be selected in the "Settings" section under the "Quizzes" tab. It cleverly means a student will be locked into the quiz once they start.
The student seeing the quiz will be told it is a locked quiz. Once they begin, the window will go to full screen mode and they won't be able to navigate away. This keeps students focused and makes this ideal for a quiz in which you have a time limit and want total focus.
Another useful feature is the ability to see if a student navigates back to a previous question to change an answer. This comes up in a connected Google Sheet, which can be used to create quizzes with multiple sections. More on that next.
How to Link a Google Form to a Google Sheet
By linking a Google Form to a Google Sheet, it allows you to analyze all the data, say from a quiz or a checklist, in different ways. That could mean outputting a chart to show attendance by pupil, for example.
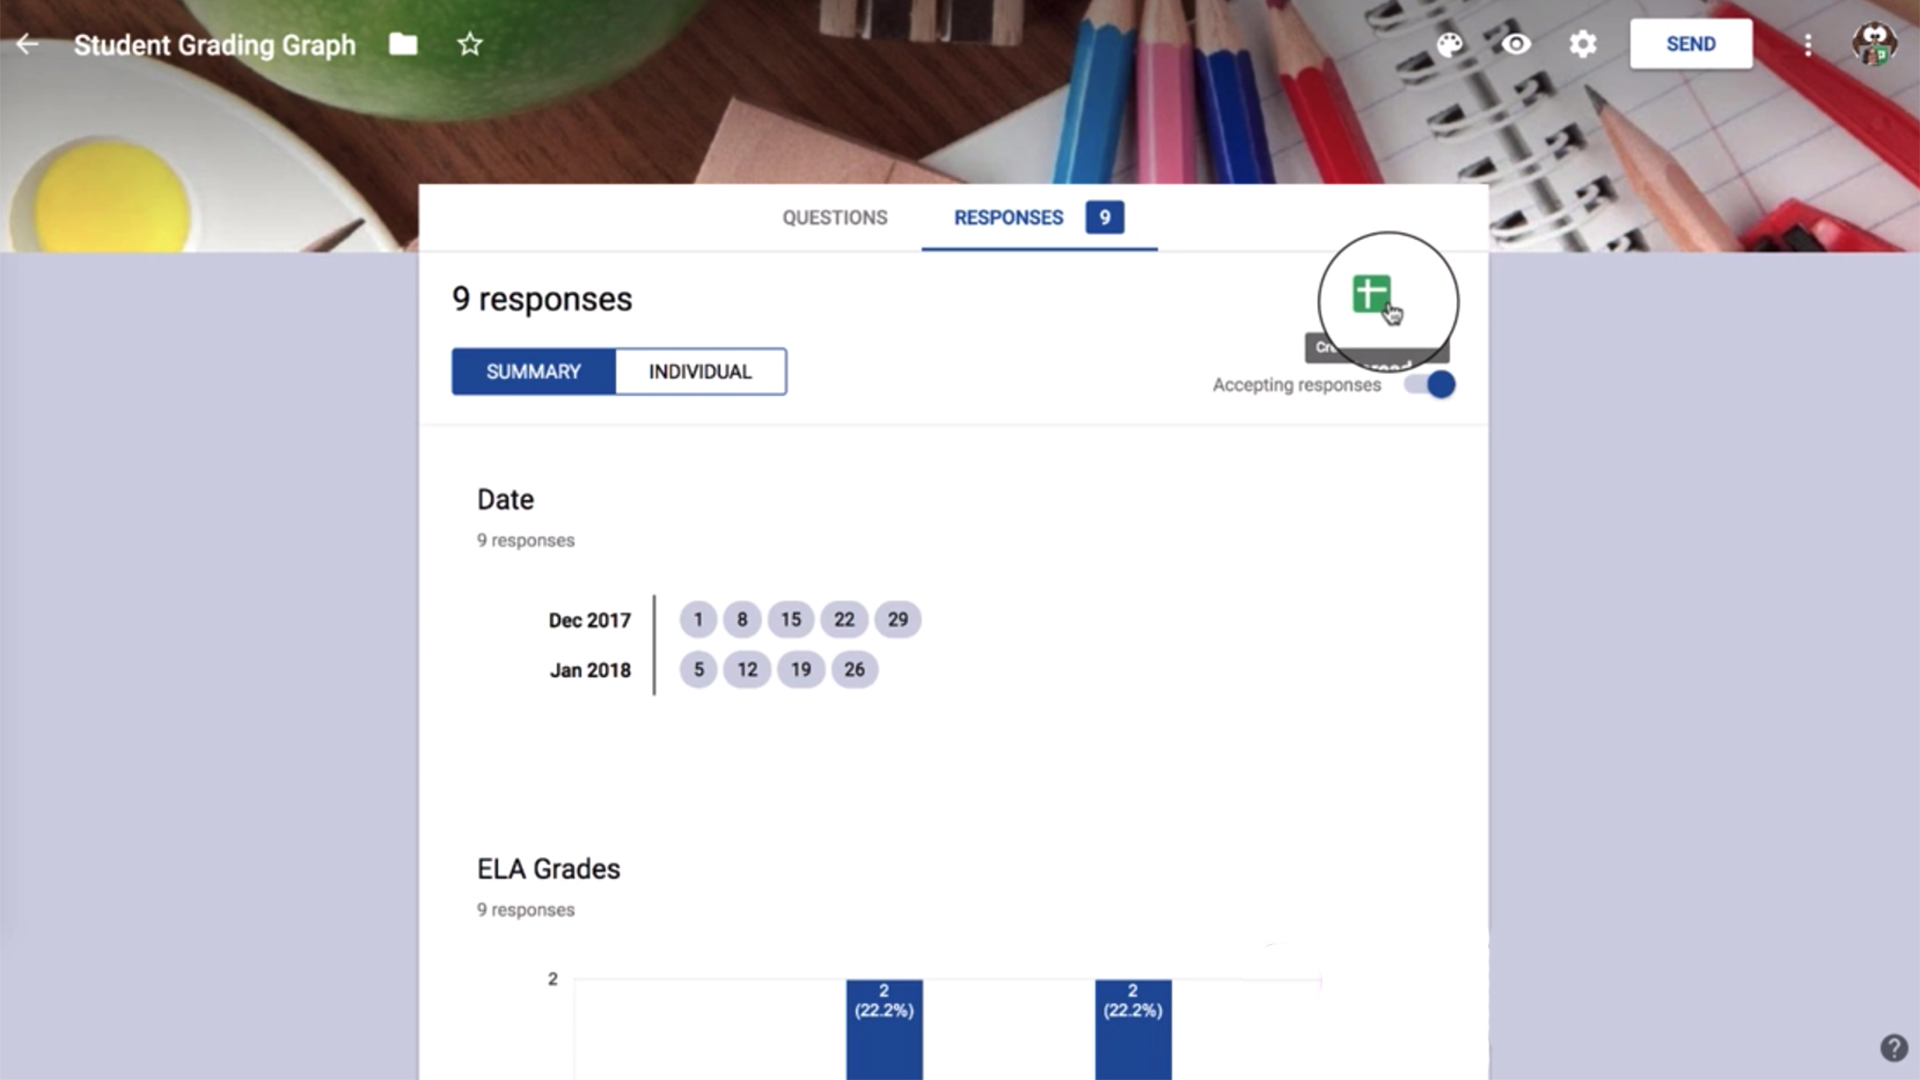
This is done very easily. Once you've created a Questions item, such as a student grading graph, you can select the "Responses" tab. This will show a summary of responses and, to the right, there is an icon of Google Sheets.
Select this icon and then you can add the data to a new Sheet or to a current one, in which it will be added as a new tab. Whichever you select, you'll be taken right into Sheets where it will be populated with the data.
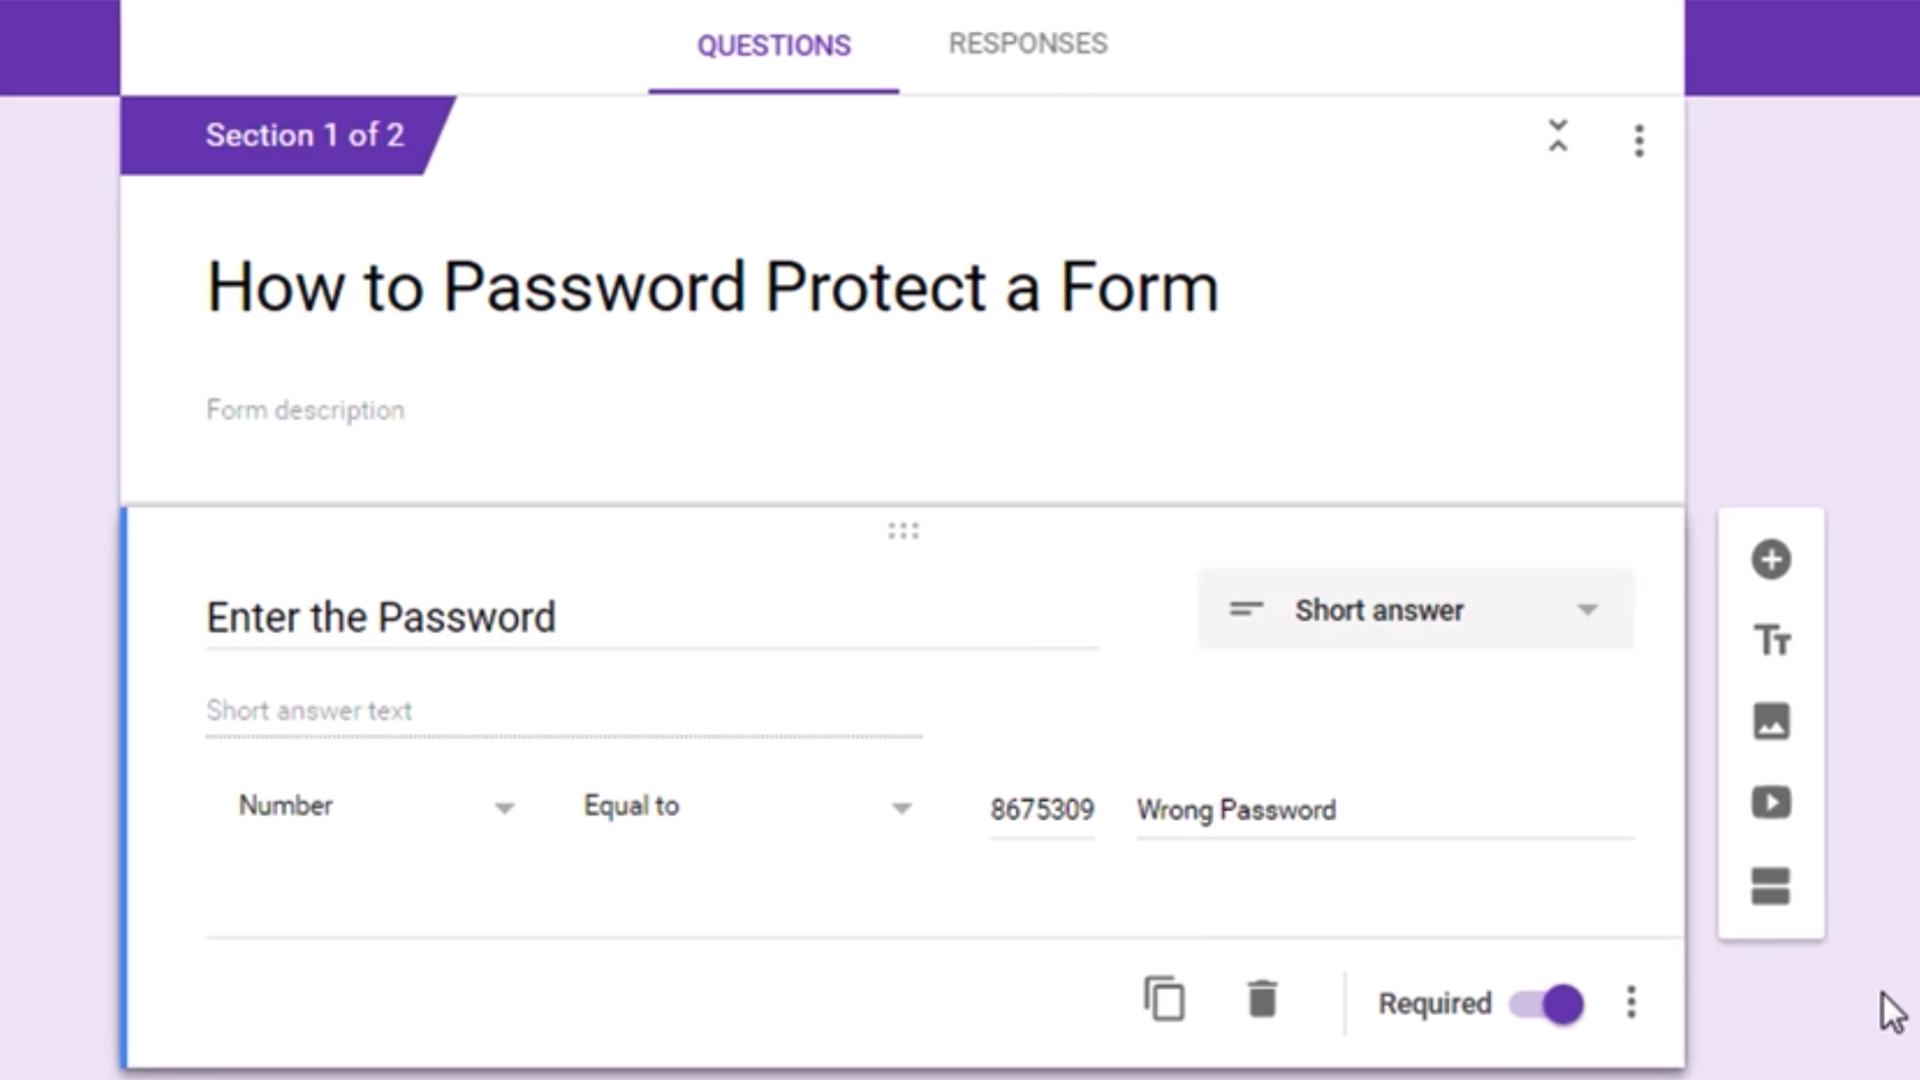
How to Password Protect a Google Form
A very useful way to ensure your quiz is only taken by those you want is to add a password. This is ideal if you want to create and post a quiz without it being taken until you send the password. It's also helpful if you post one publicly, perhaps shared school-wide, but only want certain students to take part.
Whatever your reason, there isn't an option to add a password directly to a Form. Thankfully, there's a workaround. To do this you'll need to add a new question to the start of the quiz.
This question will be set to "Required" so that the student can't access the rest until it is answered. You've probably guessed by now: This question is the password entry point.
Simply call the question "Enter password" and set the answer to "Short answer," then using the dot menu at the bottom right, select "Add data validation." Leave the first drop-down as "Number" but set the second to "Equal to." Then add in the password.
You can add a "Custom error text," such as "Wrong password," which will appear only in the case of an error. Otherwise the student will be allowed to move on to the next question and the rest of the quiz.
Luke Edwards is a freelance writer and editor with more than two decades of experience covering tech, science, and health. He writes for many publications covering health tech, software and apps, digital teaching tools, VPNs, TV, audio, smart home, antivirus, broadband, smartphones, cars and much more.
