Move Your Kids Past Simply Consuming Virtual Reality. They Need to be Making It. Tour Creator Can Help
Tools and ideas to transform education. Sign up below.
You are now subscribed
Your newsletter sign-up was successful
I spent part of last Monday working with the awesome staff of the Eisenhower Foundation at the Dwight D. Eisenhower Library and Museum. They hosted 18 teachers from around the state during a week long focus on using primary sources across the curriculum.
Part of our time together was spent talking about non-traditional primary and secondary sources. The teachers were all used to using texts such as diaries, speeches, and photographs. So it was fun sharing about stuff like artifacts and audio clips. But it was even more fun playing with virtual reality tours.
I’ve shared about virtual reality before. And if you’ve been around History Tech much, you already know that I’m convinced about the power of VR tours as part of learning.
There were some interesting conversations around primary vs. secondary sources and what really makes a virtual reality tour a primary source. And, of course, we talked about possible teaching strategies and activities for using VR as part of teaching and learning. The best question that came out of the discussion was:
Is it possible for teachers or students to create our own tours like those in Google Expeditions?
Don’t ya love that? I mean, consuming VR is great. But creating VR? Even better. When kids move past consumption to creation and innovation, good things are happening.
The problem for many teachers and students has been the creation tools available for VR have been clunky, expensive, or unworkable in the classroom. But things are getting better.
Tools and ideas to transform education. Sign up below.
A newer tool called Poly / Tour Creator now gives you and your kids the ability to create Google Expedition like tours without a lot of fuss. Plus it’s free. And because it’s also a Google tool, it works great with your inexpensive Google Cardboard VR viewers.
What’s not to like?
You can get an idea of what a Tour Creator tour looks like by checking out these examples:
- Browse through this eight scene tour titled Pioneer Life on the Prairie. Be sure to explore the hot spots embedded throughout the different scenes.
- This is a quick three scene Tour of a lookout in the Kansas Flint Hills.
Is this type of tour hard to create? I made the Flint Hills tour in less than 15 minutes using Google StreetView images. So . . . not so much. You and your kids can knock this out without a lot of trouble. This is the whole idea – having kids move up Bloom’s and across SAMR to the creation / synthesizing stage.
Here’s the cool thing. The created tour works on multiple platforms. If you viewed the two samples listed above on a laptop or Chromebook, you get the basic virtual reality view. You’re able to pan around, up or down, and click on any of the hot spots. But . . . if you view any of these tours using a smart phone, you have the option to enter the 3D version of the tour by clicking the Cardboard icon in the top right hand corner.
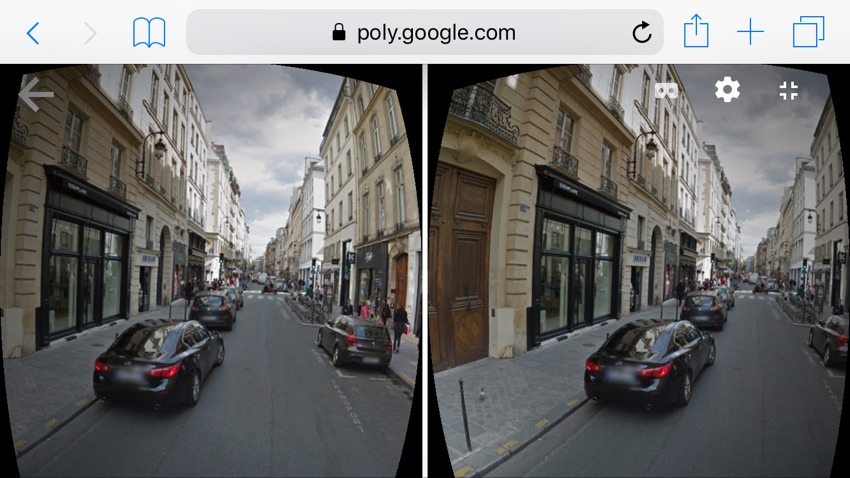
You’ll get the two stereoscopic screens. Insert your phone into your Cardboard and . . . boom. Instant 3D VR tour.
To highlight any of the hot spots or images embedded in your tour, simply aim the dot in the center of the screen at the hot spot and click the Cardboard’s trigger.
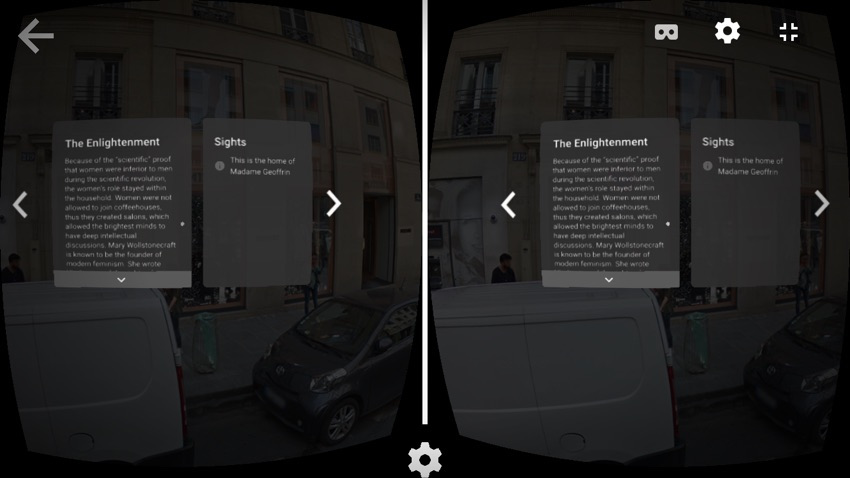
Explore the Tour Creator Gallery and check out the different tours available. (Be sure to click the ever present Google hamburger / three line menu in the top left corner to browse through different categories.)
Ready to make one of your own?
Go back to the home page and click the blue Sign In button the top right hand corner. Enter your Google account information. Then click the purple Create a Tour button in the middle of your screen. (You will need to do this on a laptop or desktop.)
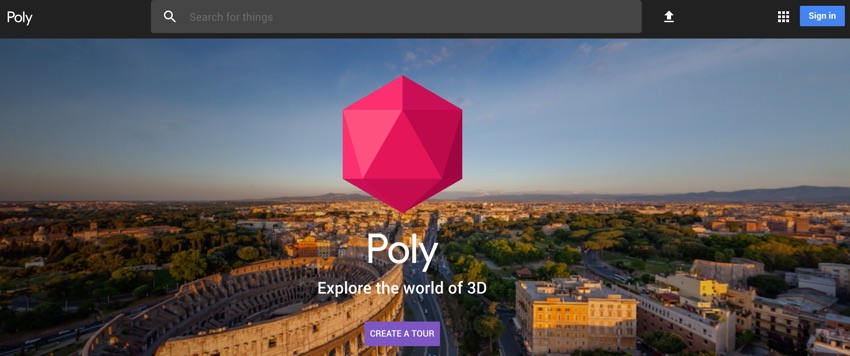
This takes you to the Tour Creator page. You should see a button to create a New Tour and Templates. Click New Tour.
Give your tour a title. Type in a brief description of your tour. Drop in a cover photo. Select a category. Click Create.
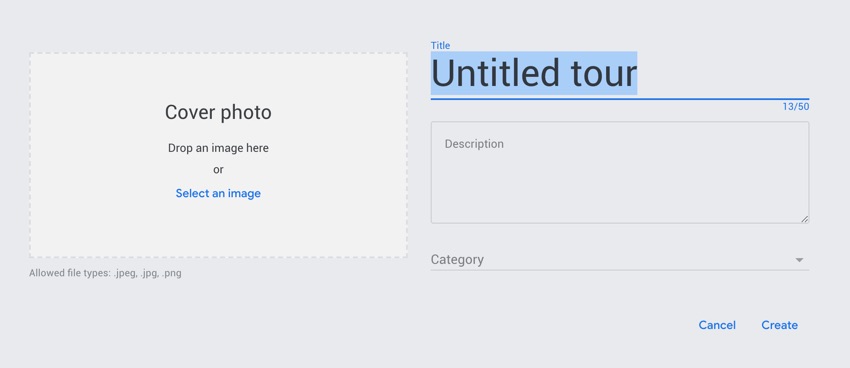
The screen will change slightly with an Add Scene button popping up in the lower left corner. Click that.
[Google Adds New Classroom Features. Use Them Responsibly.]
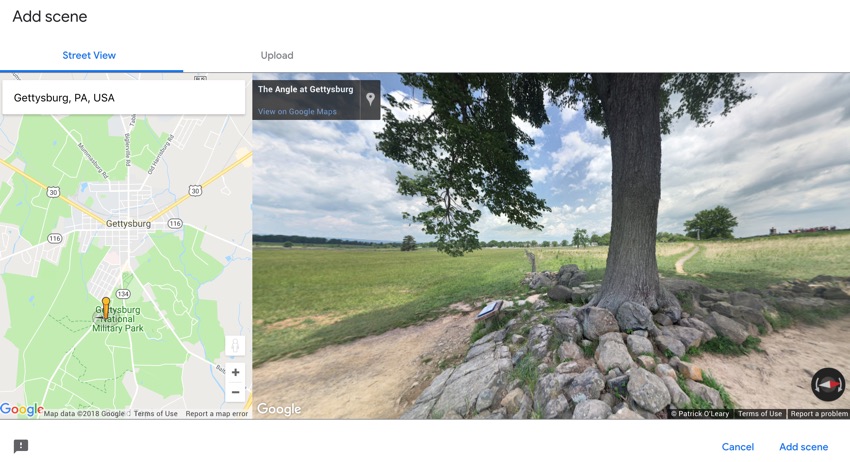
By default, you’re taken to a Google StreetView map. You also have the option to upload a 360 degree photo – we’ll get to that. For now, type in a place in the search box. You should see the yellow StreetView man on the map. Drag and drop him wherever you want. When the yellow guy is where you want your view to be, click the Add Scene in the bottom right.
I used Gettysburg.
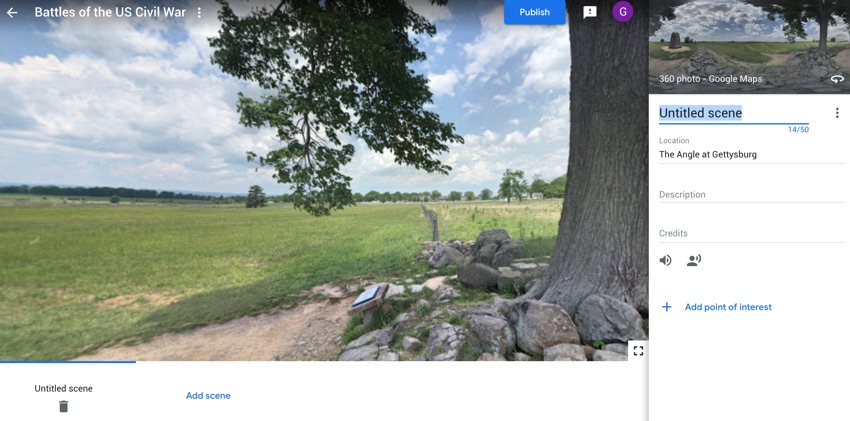
Edit your scene by naming it, editing the location if needed, and adding a brief description. This is what your users will see when they view your tour. Now for the cool part. You can insert hot spots, narration, and background audio.
To insert a hot spot, click Add Point of Interest. Drag and drop the white circle that appears anywhere on your photo. Type in a title and a description for your hot spot. To insert more hot spots, continue to click the Add Point of Interest button. You can also create image hot spots. Click the image icon below the description. Insert your image into the box that appears. Want to add audio narration? Click the speaking icon. Insert your audio file.
How sweet is that?
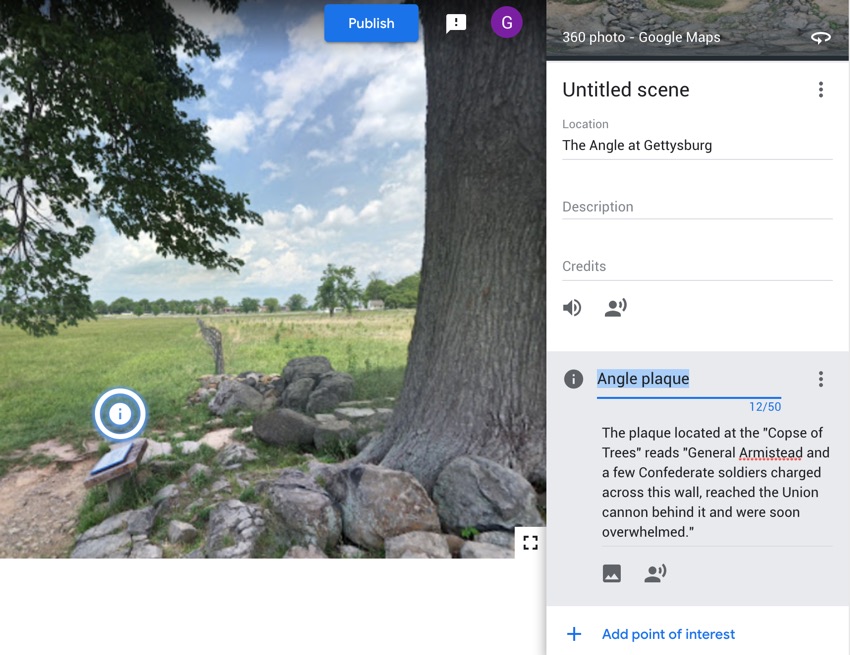
You can also drag and reorder your Points of Interest. This becomes the order that they appear to your users. Continue adding and editing scenes until your tour is complete. Click the blue Publish button in any scene to finish your scene and make it available for viewing. Choose Public or Unlisted. (Unlisted means your tour will not appear in search engines or the tour gallery. You can still share the tour’s link or embed the tour on your own site.)
After publishing your site, it will appear in your Tour Creator account along with the rest of your tours. Hover over your tour to view or edit your tour. Viewing your tour gives you the ability to Share or get an Embed code.
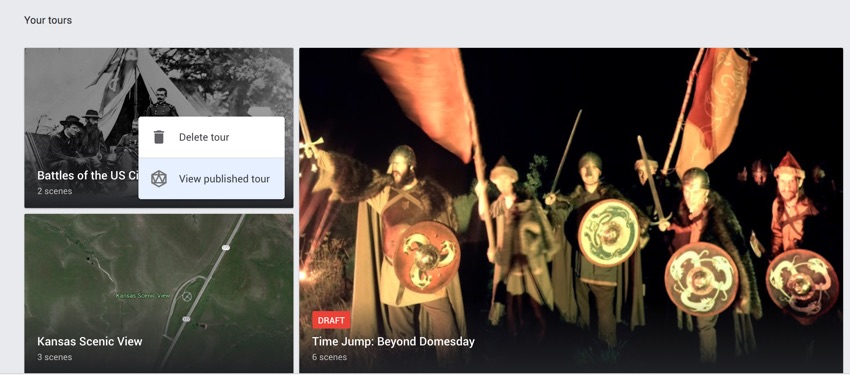
View the Civil War Battlefield tour we just made:
Easy peasy.
So you should already be thinking about the possibilities here. You can use Tour Creator to generate resources for your students. Flipped classroom materials. Study guides. Hook activities. How about creating a tour that asks your kids to figure out location based on contextual clues? Maybe your scene descriptions provide hints to the location. Have kids “race” to discover the location first.
Maybe all you do is create another piece of data that supplements other primary and secondary sources. We know how powerful 3D VR can be for engaging students with your content.
And the cool thing is that you can use your tours with on all sorts of devices. Google Cardboards with phones would be my choice but the tours are still powerful on laptops, iPads, and Chromebooks.
But I think Tour Creator is perfect for having kids develop their own tours. Rather than you creating a tour of Civi War battlefields, your kids should be doing that. Require story boards for every scene. Ask them to generate citations for their sources. What photos will they use? Why those photos? What hot spots and descriptions will go with each scene? Have them create and collect audio and narration for different scenes.
And . . .once they have their research complete and storyboards worked out, use their Google accounts to create their own Tours. Share them on your web site, highlight them via social media, and score them using an adapted digital storytelling rubric.
Ready to go deeper?
Download a 360 camera app such as FOV. Ask students to use the app to capture their own 360 degree photos. (There are other options out there.) Upload those to Tour Creator instead of using Google StreetViews.
We all love VR tools like Google Expeditions. But using Tour Creator gives you and your students the ability to go beyond simply consuming content to creating it.
cross posted at glennwiebe.org
Glenn Wiebe is an education and technology consultant with 15 years' experience teaching history and social studies. He is a curriculum consultant for ESSDACK, an educational service center in Hutchinson, Kansas, blogs frequently at History Tech and maintains Social Studies Central, a repository of resources targeted at K-12 educators. Visit
glennwiebe.org to learn more about his speaking and presentation on education technology, innovative instruction and social studies.
